This time on Geeking Out we’re looking at a range of ways to spice up your gameplay experience, with some tokens and accessories from the fine folk at Counter Attack Bases (plus a giveaway prize they’ve kindly provided) and some other scenery from our chums at Brutal Cities.
Plus, as requested by some of our readers (we have readers? who knew?!), a tutorial for beginners on how to tackle urban scenery pieces.
Read through to the end to find out how to win yourself some goodies, a discount code for a new online store for our readers, and of course find out how to enter our next contest!
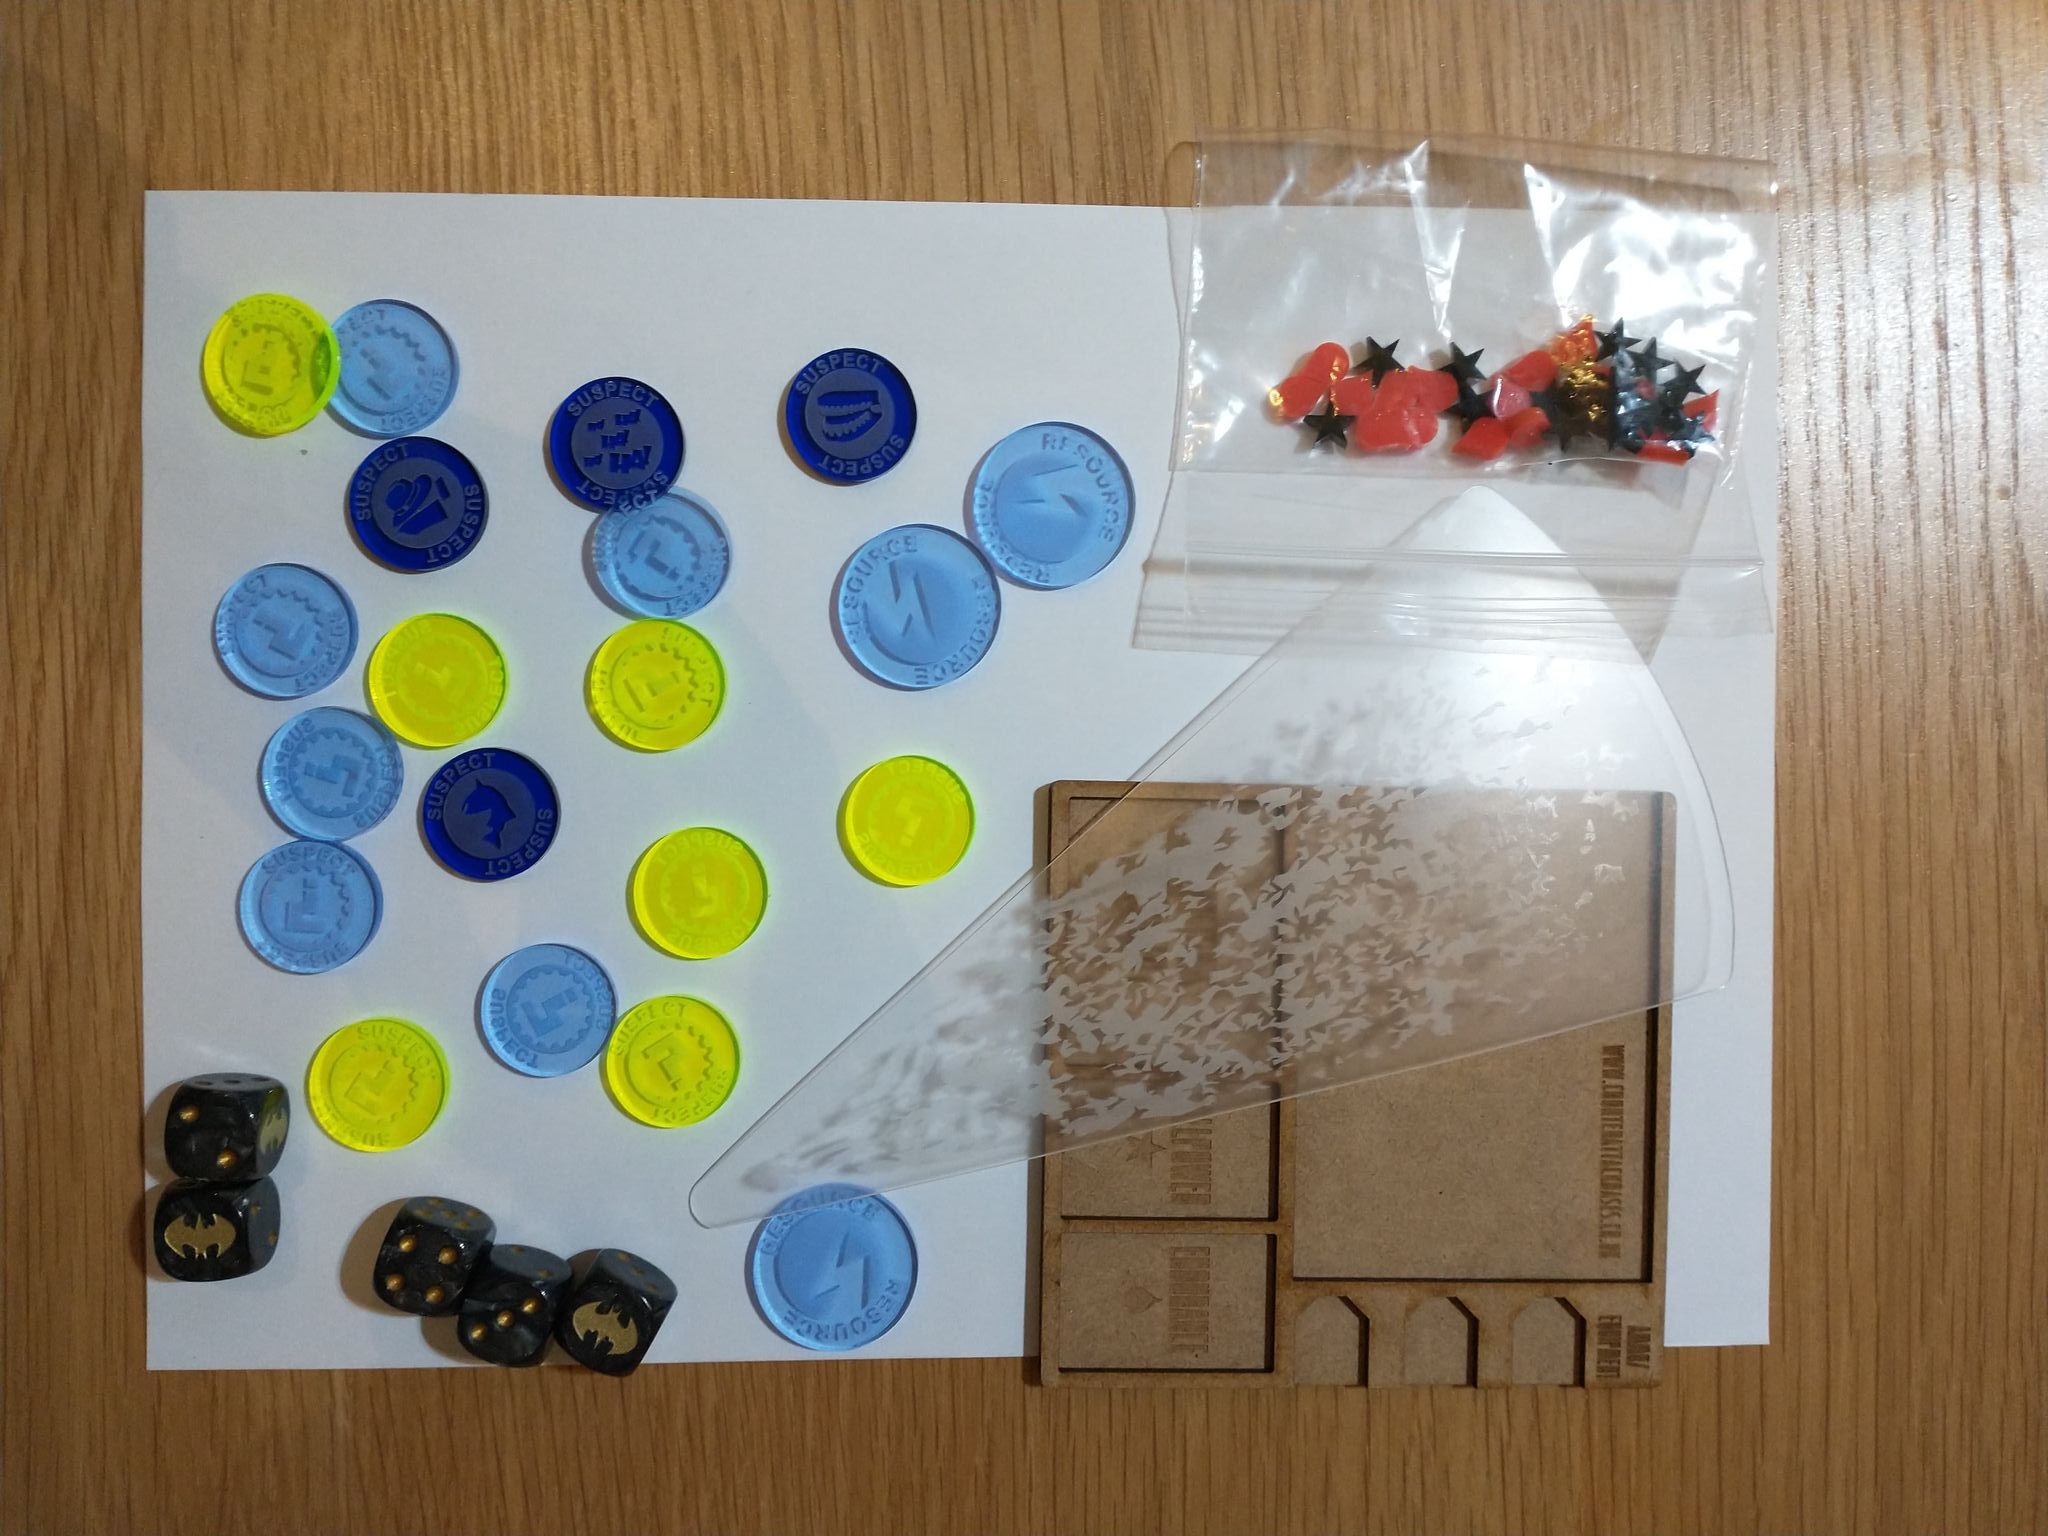
Counter Attack specialise in high-quality laser-cut perspex tokens. Now as you may know I love a well-made token, but what sets Counter Attack’s apart from the rest is the quality: this is thick and heavy that feels satisfying as a play component and isn’t likely to just skitter across a tabletop at the merest breath. We’ve particularly looked at their new range of Batman 3rd Edition tokens, and I’ll tell you right now I was so impressed that I’ve invested in some of their excellent Age of Sigmar and Transformers TCG tokens also for my eldest’s birthday.


As mentioned, suspect markers are integral to the new edition of BMG, and one of the frustrations is that the black/yellow or yellow/black token contrast on EVERYTHING in the boxset can really start to strain the eye – never mind how easy it is simply to jog one of them out of place. The Counter Attack versions, by contrast, are simple and available in whatever colour best suits.
They’ve also started making excellent faction-specific suspect markers, along with great custom dice (lookit the ickle bats!), character boards and – because you’re going to need a LOT – sets of blood and stun tokens.
If you like the look of this, head on over to them at counterattackbases.co.uk. Plus, further down the page, win yourselves a little something too!
I’ve also been building with the oversized lego that is Modular Capsule housing, or Mod-Pods, for Brutal Cities:

That’s a dozen of these bad boys, plus two scaffolding sections and a LOT of connectors :D 4 pods will set you back around £11, and £9 for a set of scaffolding, though bundles exist also.
I’m really looking forward to having them dotted about various battlefields; they might actually be my favourite set of the lot. A single pod takes about 4 minutes to build, just to make sure it’s all glued together. I’ve also added some bits from the Accessories packs, the AC unit set (£6) and Ducting & Gubbins set (£5) (again great kits, dirt cheap) to have a little – but not too much – variety.


As you can see, there’s plenty of ways of laying out even just a set of 4.
Next up, The Institute. Despite its impressive bulk and precarious appearance, this only took 12 minutes to build.
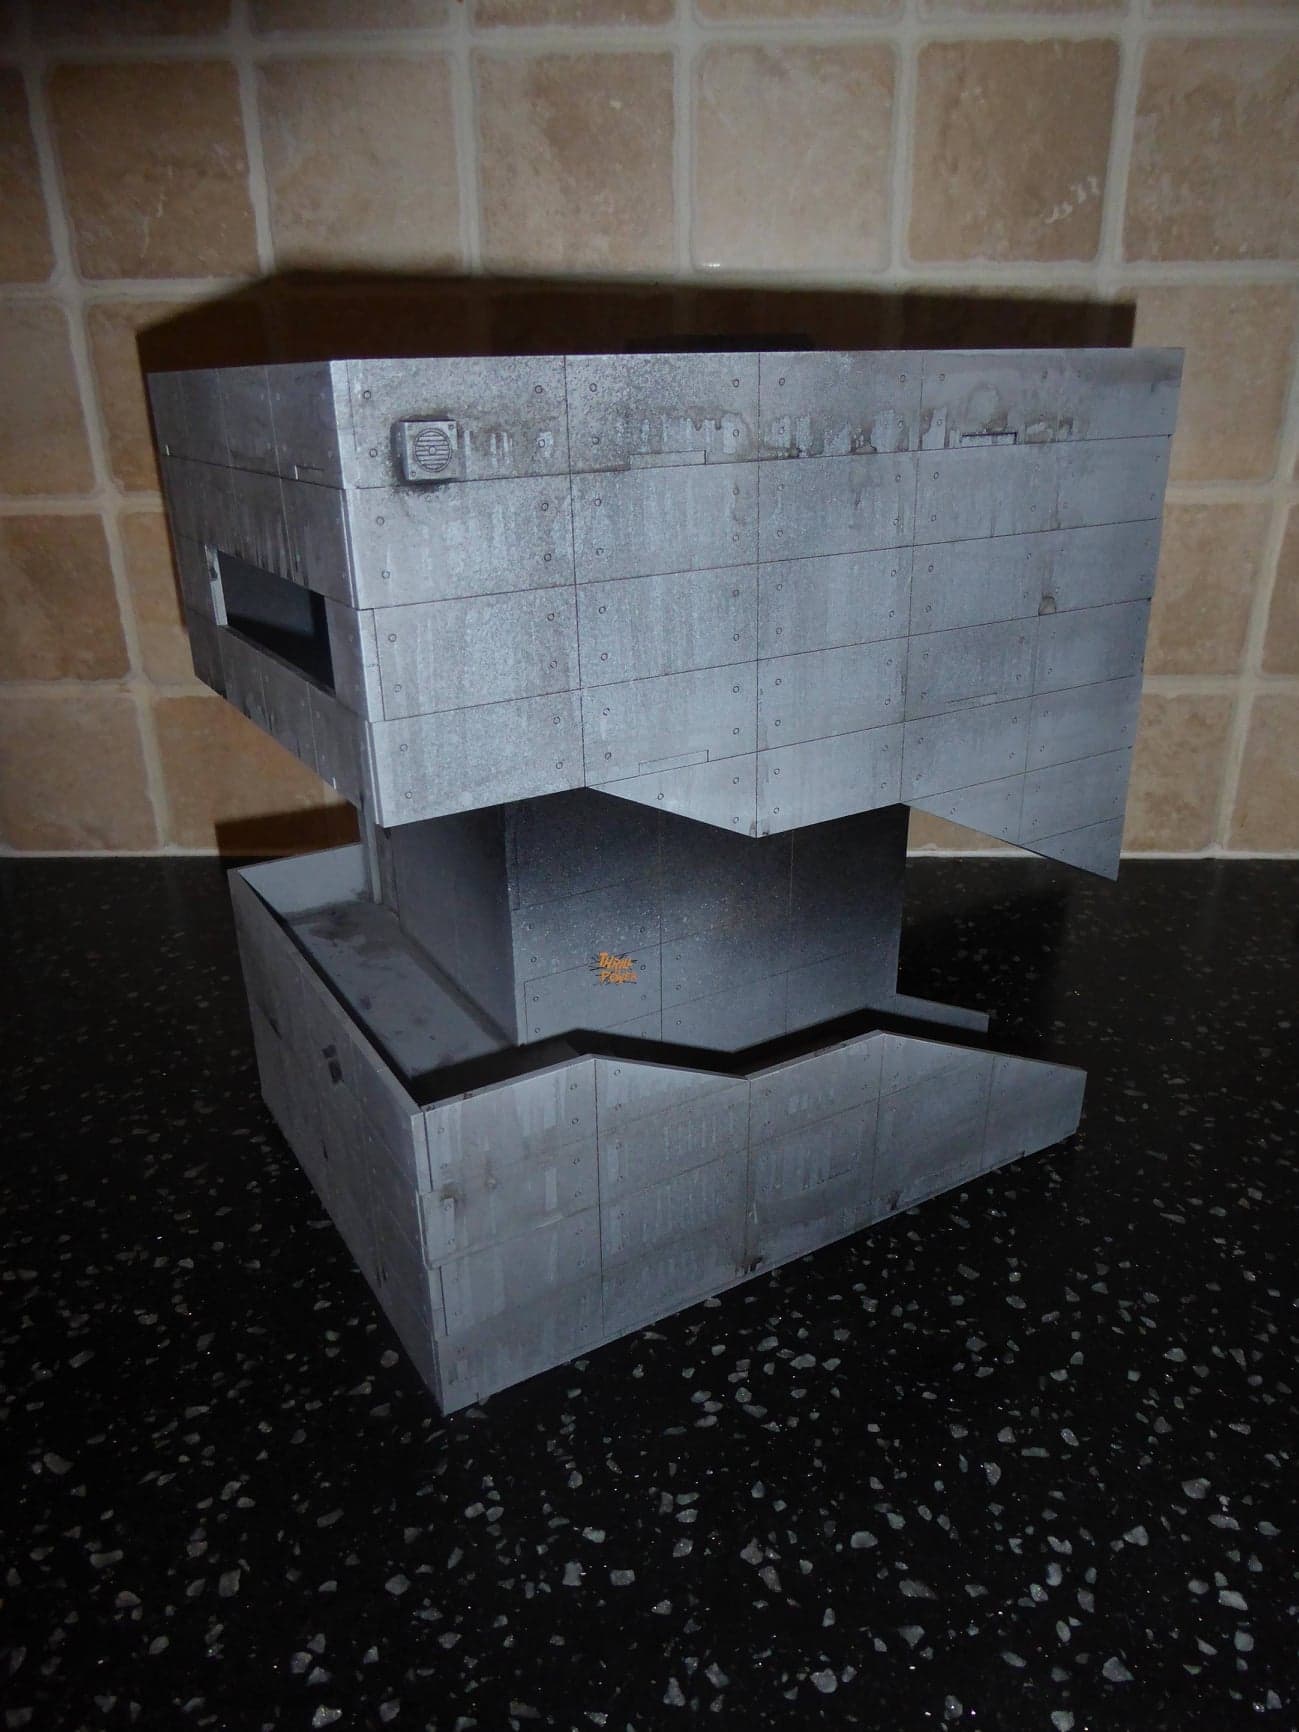
Very quick and easy to paint also; a chunky beast for £45. But it can be intimidating to tackle a big piece of scenery whatever your level of experience; so, as requested by some folk, here’s a quick run-down of how I approach terrain, using another of the Brutal Cities buildings. Cabbage Palms is a modular apartment block, coming in a 3 storey (£23) version as standard:
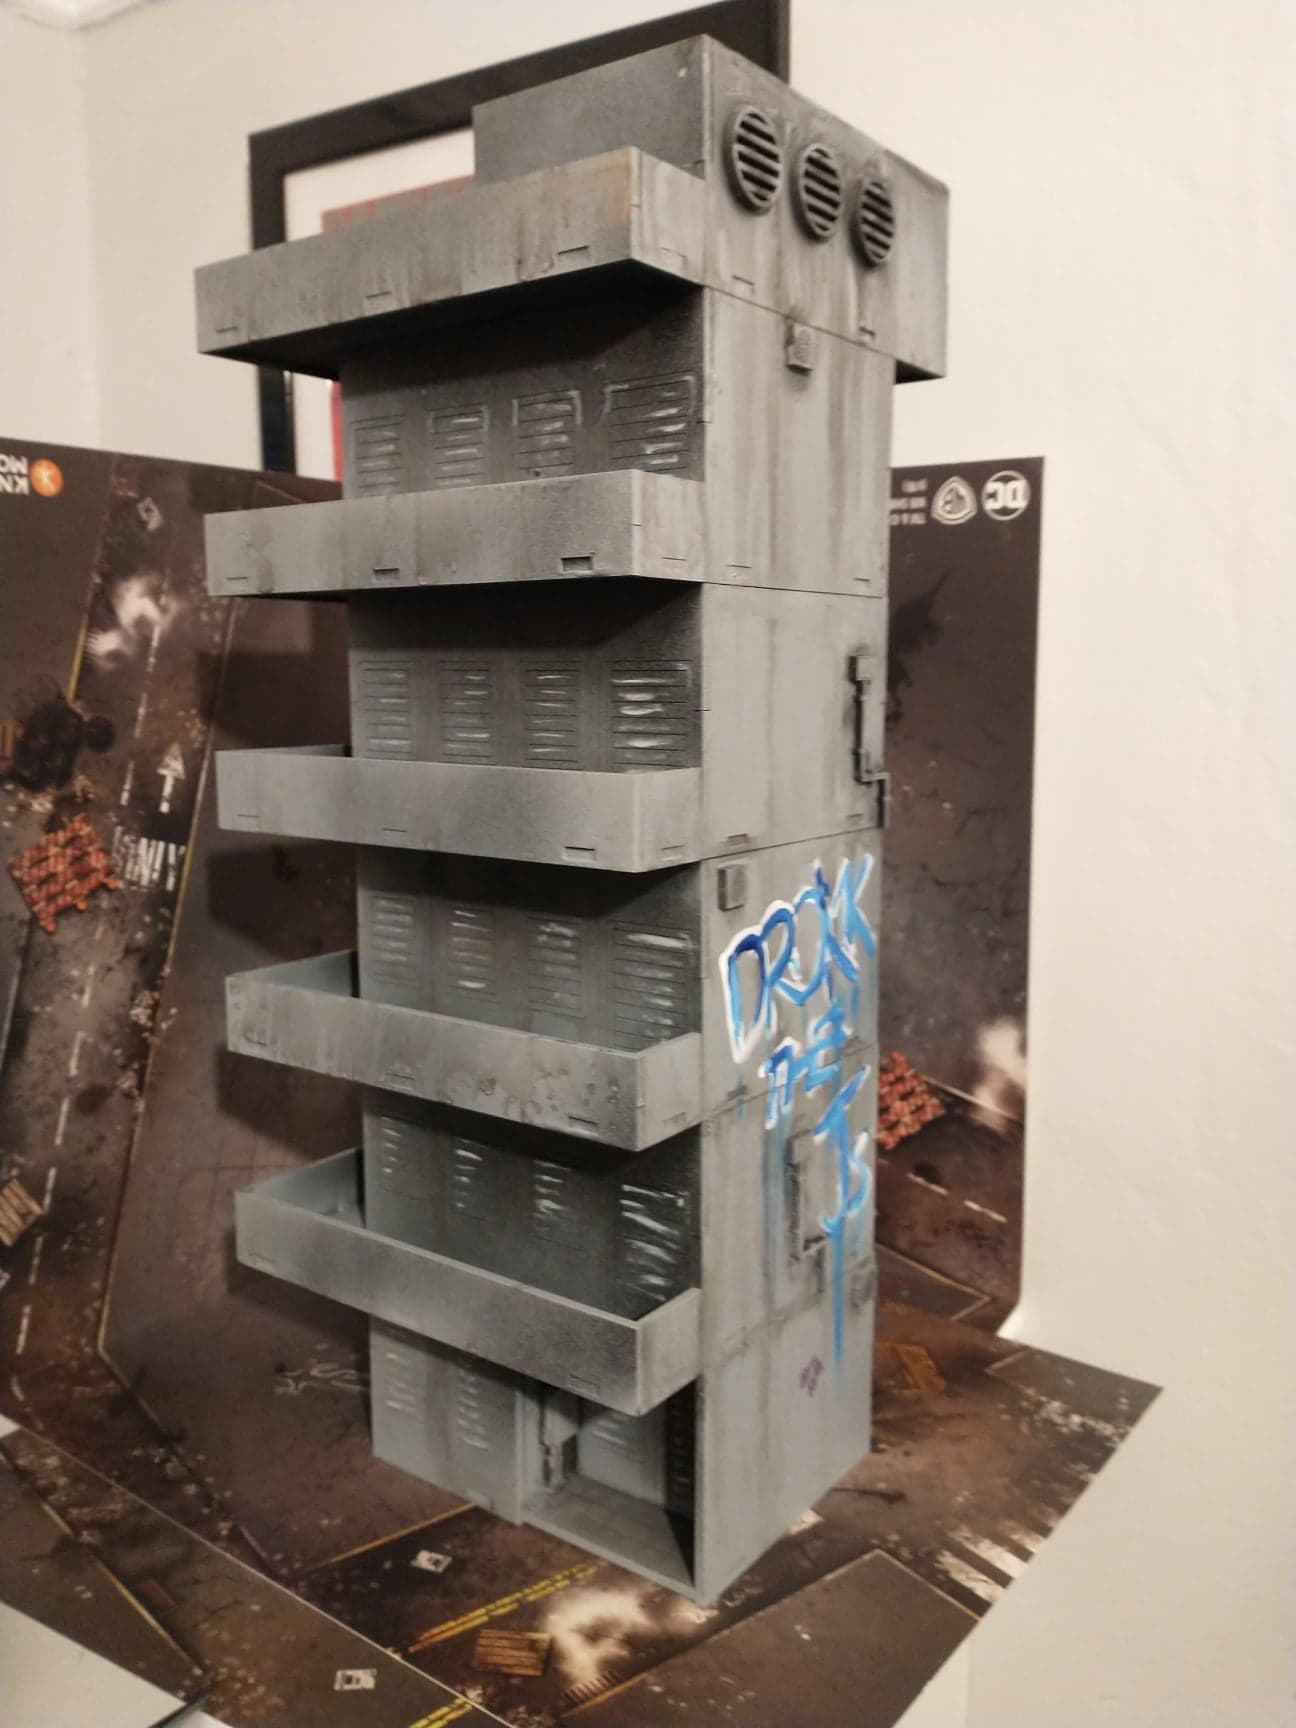
I’ll be honest, building this did take longer than other sets – closer to an hour, though that included two extra floors (£9 each) – and then, the whole thing was primed black. You can use any spray, really, but MDF soaks up paint very quickly. Some advocate prepping with thinned PVA first, but there’s really no need. Personally I’m a big fan of Kobra sprays – they’re relatively cheap and reliable – but a good alternative is car spray from Halfords or similar.
I then preshade with a mid Grey spray (Kobra’s Platform). I used a zenithal method – essentially from above at an angle, as if the light is hitting it.
I use a mix of Vallejo paints for my main colours and GW washes, mostly. It’s worth investing in a few good quality paints that can get the job done. GW products are more readily high street available, but even Amazon is a surprisingly good source of paint. Obviously, though, I advocate using a local gaming store or online specialist like Goblin Gaming, Magic Madhouse or Element Games.
1) Vallejo Model Air Black. I like this because, as airbrush paint, it’s thin enough to show throw the base grey as a highlight quickly. Drainpipe was painted with this, as were the inside of the vents and grills, and the edges of the wiring. Whilst still wet I dragged a finger down from the grills to add grime.
2) GW nuln oil. One of the most useful and versatile paints you’ll come across; think of it as a thin black ink wash. This is the most time consuming stage. Working one surface at a time, mark out each horizontal or vertical line that there is. Then, take a damp brush – dirty paint water is perfect – and simply run it along the lines, so it starts to drip and run. If it’s gathering too much just smear with you finger.
3) GW Corax white (or any light grey really) along each shutter. I worked in a triangle shape from top to bottom. I also marked out the triangles of the neon in the same. I use this paint from GW as it’s got a very high pigment concentration – it’s pretty thick and strong for a pale grey.
4) Vallejo Game Color Squid Pink to mark out the inside and outside of each triangle, smudged with finger tip to blur. However, you can use any strong, bright colour.
5) GW Thraka Green shade (I usually use their Biel-Tan but tonight it was Thraka that came to hand) down the inside and outside edges of the drainpipe. Any green wash will work, or a thinned ink.
6) Using a pure white like Vallejo Game Color Dead White inside the triangle of the neon and sketch out a big tag on the wall. Alternatively, you can use whatever white/grey you used on the shutter, although you might need a couple of layers. Then, widen it out with overlap between the letters.
7) Vallejo Model Air blue to write the tag. Because it’s airbrush paint, and the white is still wet, they’ll naturally bleed and blend together. Then, drag a little extra blue at the corners of the tag for drips if you want.
And that’s it! If I’d had more time I would have done another set of highlights, just drybrushing corners across the building as a whole with the pale grey. However, this whole process took 38 minutes – not bad.

COMPETITION WINNER
Enough of me rambling: you want to hear the winners of the last contest, right?
Winning first prize, and the honour of naming the newest Brutal Cities product is… Simon Chiassai with 305 Sunshine Alley!
And our runner up is… Preston Jacka with Omni-lofts!
Get in touch by email within 30 days to claim your prizes!
EXCLUSIVE DISCOUNT CODE
That’s not all though, because now everyone’s a winner here at Big Comic Page.
Head over to our new chums Top Hatted Hamster for all your super needs!
This new, family run store specialise in super gaming at great prices. And use the exclusive code BCP10 to get a further 10% off!
COMPETITION TIME!
As for this month’s giveaway courtesy of Counter Attack Bases… well, we’re gearing up for our Xmas preview, so let us know your recommendations for this year’s festive season by commenting on THIS POST.
Let us know, and as always, like, comment and share till your fingers drop off to get yourself a bundle of nerdy goodies!
 The Writer of this piece was: Sam Graven
Article Archive: Geeking Out
You can follow Sam on Twitter

Leave a Reply